Sunday, December 23, 2012

MEST Narrative 1.4 reviewed!

MERCS, Malifaux, and Zombies! Oh my! 

Achilles at Guerilla Miniature Games blog has posted a nice overview of the MEST Narrative Basic Game rules (v.1.4) at http://guerrillaminiaturegames.wordpress.com/2012/12/22/games-i-like-m-e-s-t-stumbled-on-these-free-skirmish-rules/

Please check out his blog for some news and entertainment.  I especially like his terrain commentaries.

Friday, December 21, 2012

Sarna Len Map

I've placed my Sarna Len world map on zoom.it via http://zoom.it/61nA

It's a fantasy world map for a campaign that I started nearly 30 years ago and was tended by two other friends while I was away in the USMC.  I've left off the labels in this map because I want to redo the naming of places by using a conlang.  I've been inspired by Mark Rosenfelder and his Language Construction Kit hosted by x at http://www.zompist.com/ .

Depending on how much time I have available, I'll update the information on my hosting site with details about the fantasy campaign setting.  Just visit http://sites.google.com/site/sarnalen and bookmark it from there.

Tuesday, December 18, 2012

Scratch-built Interior Doors


Disclaimer

I decided that since I require many interior doors and that I'm a relatively cheap SOB I'd rather build them instead of buying them.  The good news is that its easy to make decent-looking interior doors and the better news is that I've got another tutorial for sharing.  As before; I'm working on a PDF of my tutorials and I'll share them once I get the format down.

Interior Doors

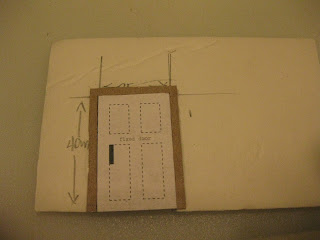
In this tutorial I'll be using the template shown at the right to construct a swinging interior door meant for use in 28 MM to 33 MM environments which corresponds roughly from 1:56 to 1:48 scale.  This particular template is for short doors and they stand about 40 mm x 25 mm in size.

Materials and Supplies

You'll need to have a wall made of foamcore, a matt-knife to cut things, some rubber cement, some wood glue, and an awl.  Plus print out the template at full-size; it was designed for 8.5" x 11" Letter but A4 won't cut too much off because the template contains multiple copies of the line art necessary for this tutorial.

I also wanted to have fancy door knobs and so I purchased really small paper fasteners known as "brads". You'll want a metal ruler with metric markings to guide your efforts on measuring and cutting.

Steps


I started with this. Use rubber cement
and glue the template to some
cardboard. Don't make the glue permanent.
I cut out all of the parts for one set.
The swing doors are what I'll want.
Cut out a 40 mm x 25 mm rectangle
into the wall to hold the swing doors.
Use wood glue and set the frames on to
both sides of the wall.  Use your fingers
to ensure they are mounted flush to the hole.
Here's what the fixed door would look
like if affixed to the frame.  It looks nice
and could serve well for most interiors.
Use an awl and scratch the cardboard along the
dotted lines for each of the swing doors.
Peel off the template when done.  Also, cut
a slot into each door at the black rectangles.
Cut out a small piece of paper and glue it
between both doors.  This forms a tab.
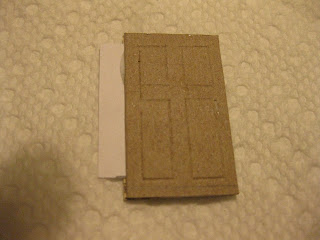
The doors are  glued back-to-back.
Line up the slot cuts.
The glue will not spread evenly, so be sure to
place a heavy weight upon them to squeeze
the cardboard together until the glue dries.
Here are those paper fasteners that I use.
I need one for each door knob.
I clipped them a bit to make them shorter
because my doors are sort of thin.
After pushing the brads through each side
this is what my door looks like.
Trim and glue the paper tab between the
frames on to the foamcore.
Here's what it looks like from the back.
The door will swing enough to open
when dry. This is a 40 mm door and
the figure is about 35 mm with base.


Friday, December 14, 2012

Scratch-built Buildings Part 6

See earlier post (part 5).

I got around to flocking the foundation boards for each of the buildings with a little help from my daughter.  She's very good at this skill and keeps the amount of wastage for glue and flock grass to a minimum.

So here's what I've got; a series of pictures showing each building from different angles and then a shot of each foundation by itself at the bottom of this series.  I've added some minis for scale reference.

The next part in this series I'll show the interiors.  I'm currently working to paint them and I have another tutorial on how to scratch-build interior doors that I'll provide as well.

Small Building A - Just Old


The easement.

The brownstone was my daughter's idea.
I think it came out nice.

Just preaching that death and destruction
just in case any of the Old Ones are listening.
The far corner.

Small Building B - Squatter's House


Our tireless model never fails to break
out a good smoke at the first opportunity
to pose in front of an old building.

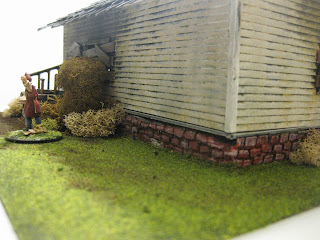
The foundation is a wee bit small but its
still good enough for game-play.

"ph'nglui mglw'nafh Cthulhu R'lyeh wgah'nagl fhtagn!"
per se

The chimney side of the building.  Ack.

Large Building A - The Nice One

Another door, another smoke break.

I designed each building to have a
unique 'character'.  This one has mostly
a good paint job and lots of green stuff.

Approaching the north door.

The railing in this one was a bit involved.
I'm thinking future efforts I'll use ShapeWays.

Completing the tour.  The house is immaculate.

Large Building B - The Legacy Fire


The main entry is burnt out, boarded-up, and over-grown.
Doesn't stop Elder McElder from reading a nice book.

Approaching the south wall.

Turning that corner to see the back of the building.

There's Deacon McDeacon with another cig.

Coming around back to the front; this
is the north wall near where the fire
had been.  Tsk. Tsk.


The Foundation Boards


The floor here was etched with an awl.

This is cork-board.  I added a layer of glue to seal it.

Plain poster-board with about four different coats
of dry-brushed paint.


The brownstone wall compliments the
hand-etched checker pattern.  The colors are
all courtesy of my daughter.


Wednesday, December 12, 2012

Small Cottage Tutorial

Overview

This is a tutorial that I've been building using Adobe InDesign.  It is for a small cottage that measures about 4.50" x 3.75" in size. I'm still in process but I want to get what I had out there before I forget.  I'll share those using Google Drive eventually.  

Materials, Supplies, and Equipment

I used basswood clapboard and wood-flooring in my project.  I also used some laser-etch spruce for my doors and windows.  In the PDF that I'll provide I've given proxies that can be cut out and used instead.  As for equipment and supplies; these would be the usual suspects such as glue-gun, wood glue, matt-knife, metal ruler, cardstock, cerealbox paper, styrene, foamcore, acrylic paints, paint brushes, etc.

The Photos

Here's what I've got as far as photos.


The Templates


Template for all four walls.
Template for floor. Includes two proxy
floor patterns in lieu of basswood
floorboard material.
The roof and support.

The Walls

Cut out the wall and floor sections from foamcore.

Glue and trim the clapboard to the walls.
Glue and trim the floorboard to the floor.


Clapboard is cut with a direction.
Ensure that the groove is facing down.


Build the chimney. It's about 2" wide at the bottom
and about 6" tall.  About 0.75" wide at the top.
Brick pattern is from this other tutorial

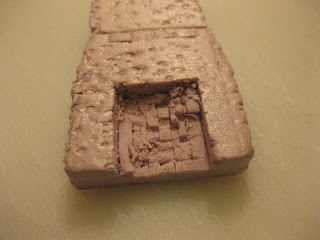
Melt the styrene

Build the hearth.
Score the inside face of the chimney.

Dig out the interior.

Continue this until the hearth is deep enough.

Use the hot-glue gun's nozzle to melt any
remaining particles within the hearth.

Cut a hole in the north wall section about 1" x 1".
It should line up with the chimney stack and hearth.

Build a fire-place out of three pieces of
styrene.  Glue it about 0.25" above the
bottom of the wall.

Here's what it should look like.

Glue the chimney stack to the outside
of the north wall.

Reduce the sides of the walls by removing
about 0.25" of foamcore on the sides.
This will need to be done for the bottom
of the north and south walls as well.

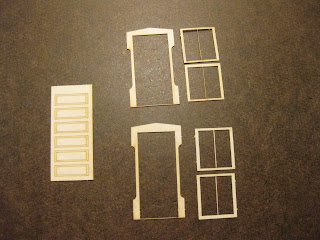
I got these laser-etched windows and door from
Rusty Stumps.  The PDF I'll provide has
proxies for these.
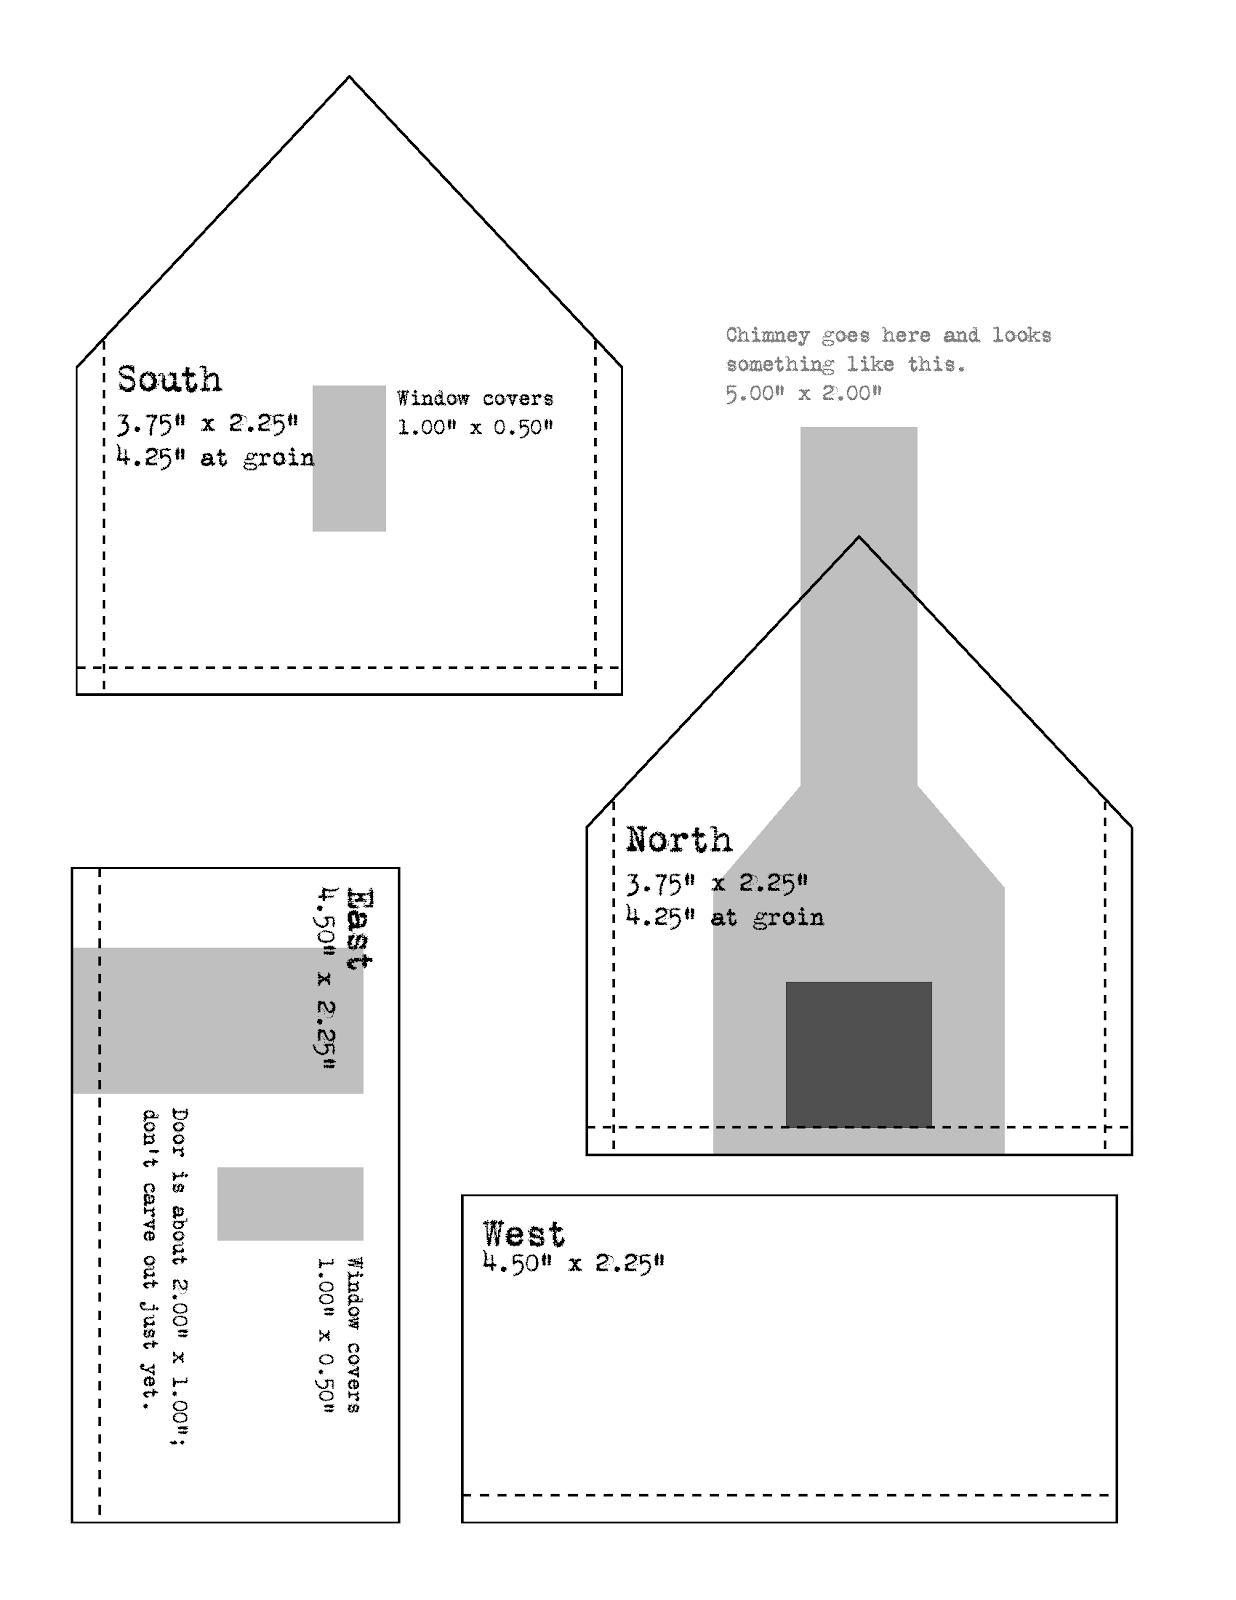
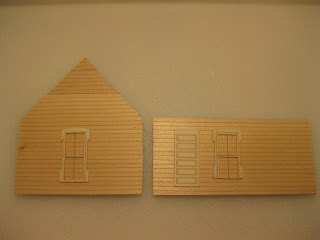
I positioned the door and windows.
The templates can only do so much.

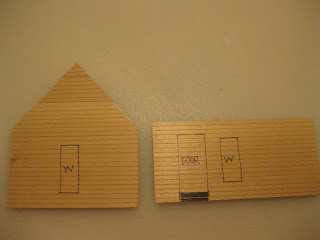
I marked the positions and dimensions.

Here's where I carved the holes.
The door is fixed and doesn't need a portal.

The Roof


Build the roof using cerealbox paper and foamcore.


I built the roof tiles using the technique
identified in an earlier blog entry.

Heres's that join row.

Applied to the top.

Here's the bottom of it all.

After trimming with some heavy scissors.

Painting Early Steps

I primed it with latex black (Krylon H20).

A painted the walls an ochre or medium yellow.

Here's a close-up.  I left some of the black
primer to show through in order to
give a sense of grittiness.


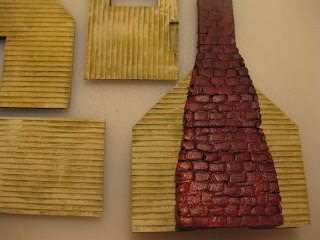
I dry-brushed an off-yellow on all of the
walls.  Here you can see the first coat
of brick-red for the chimney.  I left
some black primer showing here
as well.  Looks more interesting.

I did a green ink wash at the bottom half of three
of the four walls.  The wall with the chimney
I didn't alter.  The idea is that these buildings
had been subject to some wet weather in the past.

After dry-brushing the chimney.

For the floor the base-coat was a medium-brown.

I then dry-brushed it with the off-white.
Afterwards I applied a chestnut ink wash.

I painted the inside walls a bit.


Here you can see I got creative and dry-brushed
some black smudge with some white smudge.

This deep blue was very nice.  The inside walls
had already a funny texture because the
black primer didn't evenly apply.


On the two remaining walls I used the wallpaper
texture.  These will be in the PDF.

After gluing in the door and window(s).
I painted those an off-white.

The inside wall I also added
another laser-etched door.
I glued a small matchstick adjacent
to form a door jamb.

Painting the Roof

I cut a notch for the chimney stack.

After painting a base-coat in medium-gray.

Applied a blue ink wash.

Dry-brushed with white.  It is ready.

Final Assembly

Assemble the walls by gluing them to the floor.
This diagram demonstrates the positioning and
reveals why we need to trim the foamcore earlier.

Playing around with the walls.  Last chance
to do this before everything gets glued together.

Here's everything glued together.

View of the interior.

Another angle.

The north face.  Flash was on; oops.

The south face.  What a beauty!