Monday, January 25, 2016

Repurposing Clix III (and D&D Minis, and also those G-uys W-ho should not be named)

These are continuing from an earlier post.  I finished up a few more figures from my collection of HeroClix and some D&D Miniatures.  I really like my Hellbeasts ... er ... Wargs ... er ... Dirgehounds. Yeah. Dirgehounds.

Front. I added a different color ink wash to make the
 three distinguishable from each other.  Actually, I think these
are part of the old Dungeons and Dragons Miniatures line.

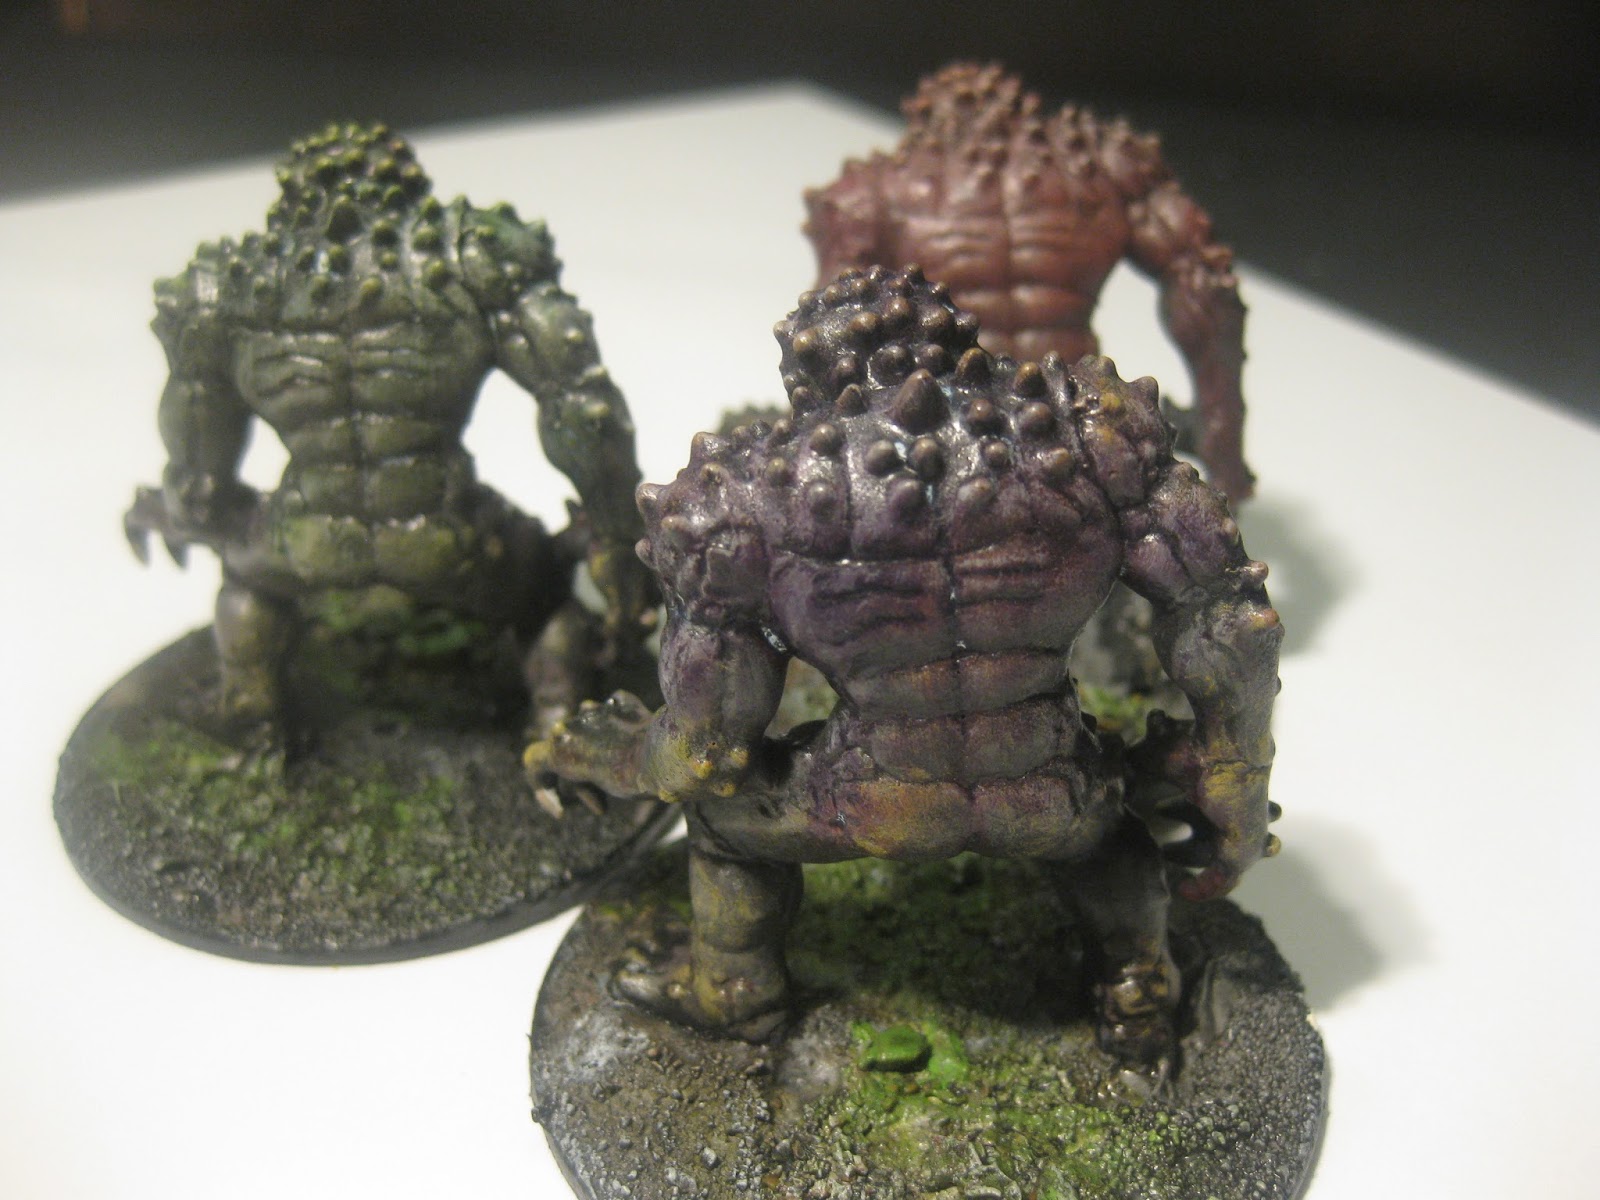
The backs. The spikes really stand out with a dry brush technique.

Front of the pack leader for the Dirgehounds. The little red dot is the exact front of the figure; I'm in process of play-testing some facing rules for MEST.

There's a total of 10 Dirgehounds.  The pack leader and
the second are the only two with horns or tusks.

This is one of the many low-detail D&D Minis pieces and
so I tried to build
up some of the niceties using layers of paint.  

Another low-detail piece from D&D Minis.

Elf Princess.  Another cheap-o figure. I really should consider
getting higher-quality figures.   Nah. Wargaming on a budget.

Ah! One of my favorite pieces. A Formorian Giant from
D&D Minis. A standard 28MM figure is in the foreground.
I think the giant is about 3.5-inches tall.

Here it is again. The bases is still wet and I'll need to dry-bush
it to bring out the pebble details. I added lots of paint
layers to build up the surface of the giant.

I haven't yet mastered the technique for eyes yet, but this
giant has lop-sided everything including eyes.  Everything
else I brushed in fine details. The skin is like four layers
of different paint going from medium to lighter. I then
added a Gryphon Sepia wash and then dry-brush Elf Flesh.

Another look at the kind of details I added like at the
palm of the hand holding the petrified tree trunk mace.

Final picture; this one for scale. The human-sized Hero Clix sword-elf
at the front, left is a Reaper Bathalien, then the D&D Minis
"thingamajiga" followed by a D&D Minis Flesh Golem.


Monday, January 18, 2016

Shadows of Brimstone - Speed Painting WIP

I bought the Shadows of Brimstone swamp set a few months ago but never got around to painting any of them. The game itself seems like a great buy with tons of minis, cards, tiles and tokens but I have yet to play.
Be warned though, assembling the plastic minis was mind numbing. I have put together other plastic minis before, but for some reason these were pretty rough.
I used multiple layers of watered down white glue as an easy way to fill in the numerous gaps. 
My approach to painting these was sort of a rough sketch concept, quick and dirty but with (hopefully) interesting blended colors. I quickly got the paint down and added highlights inks and powders.
For the effort I made, I'm pretty happy with the results so far.

These things were orange at one point. Now they look more green and purple.

Tentacles!

Old west zombies!!!!

Bat Things! (these didn't photo very well)

The lot so far.

I still have the heroes and a huge night gaunt looking creature to go!
Hopefully I'll get them done sooner than later.

Saturday, January 16, 2016

Reaper Bones Skeletons

I got some more time to paint, and my allergies have subsided a bit.  And so ... in preparation for the Dungeon of Death genre for MEST, I've purchased some Reaper Bones Skeletons and painted them up! Here's my journey from start to finish.

I purchased these from Game Kastle Fremont.  They were
in process being received and I snagged them.

I started collecting and playing miniatures games with Aggro,
and so he uses the UK style of basing 28MM figures upon 1.25-inch fender
washers.  The white stuff here is E-6000  glue that I purchased
from Michael's.

Afterwards I start flocking the base with fine-grit after
swabbing it profusely with Elmer's Glue

I add various granularities of grit to make the bases look
interesting.  All of this can be had from most hobby stores.

Once the glue beneath the grit dries, I seal the grit in with
a film layer of more Elmer's Glue. In this case I used the
clear glue type, but its not that important.

These wooden sprues are very useful for mass-painting.
Essentially they are spaced about 3-inches apart and I fitted
with a magnetic disc. I can have about 6 figures on each
stick. Because my bases are metal washers, they hold into
place so that I can swing the stick around when spray-painting
primer coat, or sealant.

This is the primer coat; my first step of each painting sequence.
The dark color is black and helps me cheat during the painting process
because that sort of sets the crevasses within each figure
so that I won't have to paint them.

After the primer coat dries, I do a dry-brush technique using
a yellowish off-white color to make the details pop. This
step serves to help me identify where to paint as well as allow
later coats of color to appear brighter.

I then dry-brush pure-white in less places than the yellowish
off-white. This is to make the later coats of color stand-out
even more. I'll eventually add a wash to the color so that
they'll not look so cartoonish.

By the way, this thimble-type thingy is something I recommend.
With the magnetic base, I can place a figure upon it while painting.

Here's what I mean; by having the thimble I can paint the
figure with more control and less risk of dirtying my fingers
or even smudging my paint job. Quite important for when
I start painting the base of the figurines.

I'm starting to add color to the archers. The first color laid upon
all of your figures should be as dark as possible. 

Here's what it looks like upon the thimble. It's not that important
at this point to use the thimble; it's more for later when I do
the bases really.

Here's the axe-guard back. It's hard to see, but I've used a light-green dry-brush
against that darker green. It looks nice up close but I'm realizing
that I need either a better camera, a dolly for the camera, or steadier hands.
I'm not very good at this; the pictures are a bit blurry. Sorry.

Front of the sword warrior. I've begun to add color to the shield
and to the weapons. Here's brick red. The bloody effect on the
blades is to paint it with a light coat of red and then pulling
the color off with my fingers by cleaning it. When I used a
tissue to do that, too much color got cleaned away.

The haft of the axe is medium brown followed by a brown ink
wash to give it interesting detail. I did the same for all of the wood
elements such as the bows and the shields. The helmet is a light
coat of metallic copper. I hate working with the metallic
stuff; it always seems to either clump, be too dense, or go on too thin.

Here I've begun to add metallic gold for spots of color.
The pauldron is copper, as is the scale-armor kilt. The
bandaged feet is just brown ink wash.

Front of the sword warrior with brown ink wash on the shield
and the hilt. The shield straps are brick red. With washes,
be sure to add enough water and be sure that the figure
is dry in the areas where the wash will be applied. After
the wash dries, you can always add more in case it is too light.

Here's the same figure after I started adding a very very light
brown ink wash to the whites of the skeleton bones. The ink
settles into the crevasses and it gives a nice effect with the
black from the primer coat applied earlier.

More of the brown ink wash is applied to the other figures.
On these shields I first painted then chainmail silver metallic.
The boots are medium brown with the brown ink wash for detail.

Top view of the archer. I've already added that gold dry-brush
to the pauldron. The white band on the bow is the distinguish
it from the other two models with the same design.

At this point, the skeletons are essentially done, and so I
begin work on the bases. It's five steps; #1 flat light-gray everywhere
on the base, #2 add brown ink wash dabbles on some parts ...

#3 add light green paint wash dabbles on some parts, #4 when
everything dries, add a black ink wash over the entire base. This
makes the other colors much more clear.

#5 the final step is to use the light-gray to lightly dry-bush
parts of the base to make the black ink wash looks less shiny.

As a flourish, I paint the edges of the base pure black. I also add a 1.2-inch label sticker at the bottom
of my figure bases so that when the models are KO'd
during game-play it looks pretty. A secondary benefit
could be to label the bottom of the bases so that they
can be uniquely identified. Anyhow, the labels can be
replaced whenever necessary. 

Final result; ta da! In total, 18 figures with 6 variations so
three figures each. This took about 2 hours a day for 4 days,
which is an average of  about 30 minutes per figure.