Friday, September 28, 2018

Preparing for Dunjon of Death IV :: The Terrain

Link to Part III-F

Overview

Here's where I go into my cache of half-finished terrain elements and paint them! Dunjon of Death has been in planning for at least 2 years, if not earlier ... and I've got lots of stuff to lay out.

The General Plan

Essentially I'll paint them the same as the others:

  1. Base coat of black paint plus clear Elmer's glue. Good news; inexpensive. Bad news; if you get it wet, the glue (and paint!) comes off. Good news; you shouldn't be getting any of your terrain or figurines wet any time soon ... right? No coffee or beer on or near the gaming stuff.
  2. Afterwards, I'll dry-brush with dark grey using a 2-inch brush. Mostly top to bottom strokes.
  3. Next, I'll dry-brush with medium-gray using a 0.75-inch brush. Mostly pulling from the bottom near the tile floor upwards to about mid-height.
  4. Using the same brush and paint, I'll dry-brush from the top down to make details pop.
  5. Lastly, using light gray or white, I'll dry-brush the edges of edge terrain element to make them pop out.

The Terrain

Here's what I've started with;

All the things.

Coat of black + PVC glue.

Dry-brush with dark gray.

Awaiting the medium gray.

Everything is Done

Here's everything painted.


Left side of my table are the recent terrain items.

On the right side of the table are my doors from earlier posts. Remember that these are Zombicide and Dungeon Saga doors.

A Reaper Bones Skeleton Swordsman next to the Central Blocks. These blocks are about 3 by 2 by 2-inches.

Dude next to one of the Cornice Pillars. I have a bunch of cake-shop Greek pillars that I'll need to eventually set up as well.

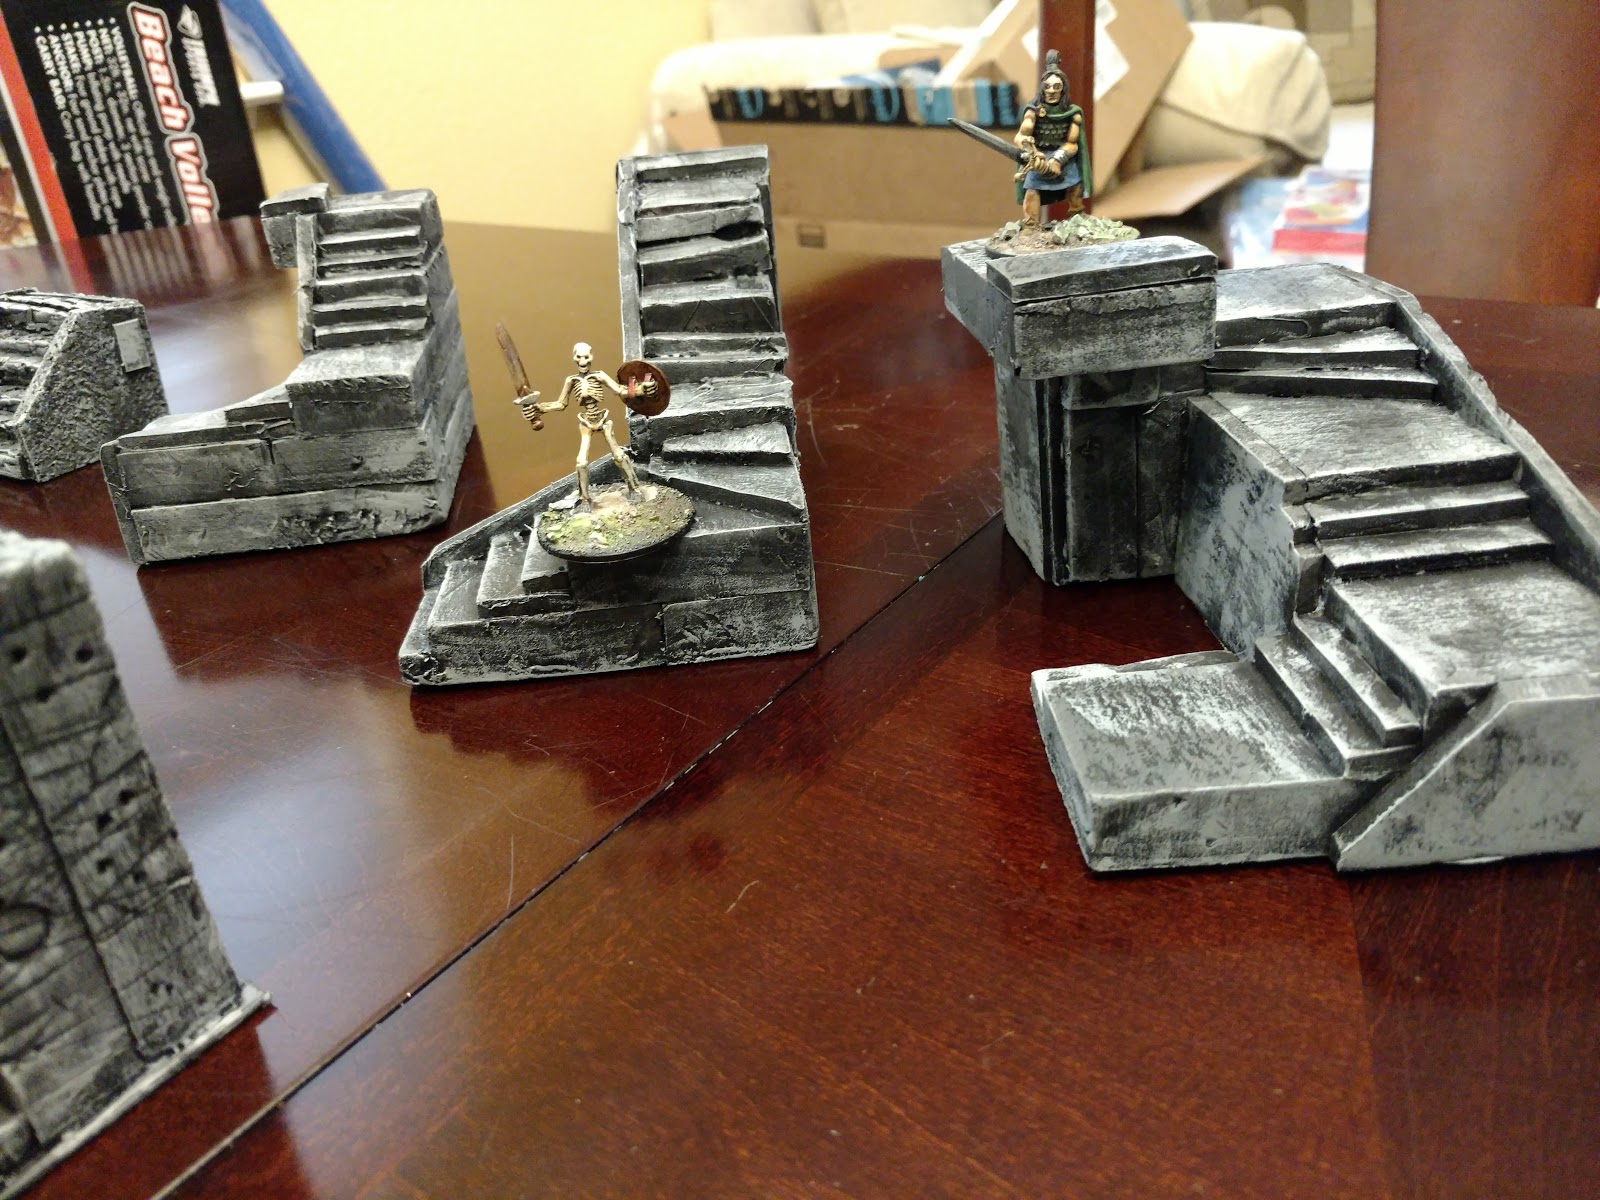
I've got three stair cases and two stair bases. I just noticed that the fights are all right-winding. And so I'll create some later; maybe a straight stair case, and two L-shaped left-winding.

The Dungeon Saga and Zombicide doors. These behind the Celt are my "Damaged" doors.

OK. And finally the skeleton warrior next to the single-doors; these are both Zombicide doors.

Inventory

Here's my inventory for the curious.
  • 14 Passage Ways (wall with a hole, no door)
  • 19 Single Doors (that's Zombicide)
  • 3 Double Doors
  • 1 Double Door, broken
  • 3 Great Doors, unmoving (that's Dungeon Saga)
  • 1 Single Gate, jammed.
  • 3 Stair cases, right-winding.
  • 2 Stair bases (single short flight).
  • 8 Wall sections.
  • 2 Fallen stella.
  • 6 Wall Blocks (4 plain, 2 crowned)
  • 6 Central Blocks
  • 7 Cornice Pillars
  • Plus ... 25 modular Dunjon of Death tiles (22 square, 3 start/exit which are rectangluar).

What's Next

I'll show you everything I've got put together. 

Friday, September 21, 2018

Preparing for Dunjon of Death III-F :: The Tiles - Done for Now!

VISIT PART III-E

Update

So, this is the final post with the tiles for now because Dunjon of Death needs much more other stuff created and painted.

I printed these out using the Grebb font-face. I'll make the assets available eventually; I just need to confirm that all of the assets work together properly. For example, this sheet has more than is necessary for the tiles since it has tile IDs such as S5 or C5 which I haven't created. And probably won't need to.

Cutting stuff up. There's two sets; one with a red bar for the face of the tiles which I place at the top-left corner. And one matching with a white bar and matching tile ID which I place beneath each removable wall for those tiles with removable walls.

Here's what I mean; top-left red bar. Bottom of removable wall is white bar. BTW, I learned that the glue shown in this picture eats away at styrene ... so it melted my walls where I poured too much glue. Don't be a dummy like me.

These are all of the tiles randomly placed near each other with the tile ID markers always in the top-right.


I tried standing on my dining room chair to get an "aerial" picture. First, the 21 tiles flowed over the table and there was no room for the START and END tiles (per Dunjon of Death). Secondly, I think I need to get a selfie stick.

Here's one end of the 21 tiles laid out.

And here's the other end view. That tiny person is my Little One; she helped me paint some of the tiles black early in the project. 


In the Future ...

Here's an example of what can be done with electronic tikki-light torches.

Here's something I'll blog about once I find the ideal solution. Essentially this is a tea-light LED which flickers when given a 3V coin-battery power source. If you look close those wires going beneath the bulb are the leads and they'll cut into the walls. The other side will be the wiring and power source. The square panel could conceivably be switched out for decorations (tapestry cloth, wall column, fountain, etc).

Basically all of the walls with LED torches will be constructed similar to this proof-of-concept wall. At present the 3V coin battery sits atop the wall (5CM) with the wires fed through the center of the polystyrene. The fixture in red is attached magnetically to allow me to remove it and the wires. The yellow strands at the top is actually yellow cellophane from a butterscotch candy treat, and is secured in place with a hot-glue gun.

Friday, September 14, 2018

Preparing for Dunjon of Death III-E :: The Tiles - Bulk Finish

VISIT PART III-D

Update

The Tiles are nearly finished. This post shows that I've added a dry-bush medium gray upon the tiles and then I've given it some daubs in brown and lime-green. 

This is what the medium-gray dry-brush effect looks like. I'm painting with the flat of the brush and pulling from the bottom of the tile wall upwards. For this I've been using a 1-inch brush.

Here's a bigger tile with the medium-gray in place.

With a door in place.

With a door in place and some denizens and a murder-hobo.

Daub with Brown 

The brown daubs is to introduce dirt and mud into the sterile gray terrain of the tiles.

For daubing, I've purchased some "loofa" sponges. They are too big, and so I need to rip them to a smaller size. The colors I want to use are browns and greens.

I use a paper-towel to press the sponge into and evenly distribute the paint. BTW, you will need to rinse and squeeze the sponges with water before using them; this helps the pigments keep moist and lay with little effort.

Trial run with the dark brown.

Trial run with the dark brown and then the medium brown above that. Not too bad. The intent is to show dirt upon the tiles. 

Here's a couple of tiles finished. I got a bit more brave with the application of colors after a bit of time.

The shape of the sponge and the pore sizes is very important. The larger sponges are difficult to use within the narrow confines of many halls and rooms within the tiles.

Here's one of the "decrepit" rooms with the daubs of brownish color. Looks a bit more lively and a lot less gray.

Some tiles together with a door way.

Here's one of the tiles completed with the brown daubs. Miniature for contrast.

Daub with Greeen

The lime-green daubs are to indicate moisture through the presence of lichen, mold, or moss.

Everywhere on all of the tiles, I used the lime-green and liberally daubed it upon the bases of various walls and corners. I'm imagining that these are lichen or fungus of some sort.

Here's one of the rooms all ready. Kill the Enchantress!

Another angle of the room.

What's Next?

I think the tiles are good enough for now.  I want to start labeling the tiles to match up with the Dunjon of Death tile cards so that I can try out the rules and optimize them.
  1. I think I'll eventually sprinkle some flocking in many places later for moss or grass.
  2. I will want to start adding dunjon terrain; treasure chests, torches, pillars, etc.


Friday, September 7, 2018

Preparing for Dunjon of Death III-D :: The Tiles - WIP Dry-brush Dark Gray

VISIT PART III-C

Update

Here's another update on the progress with the tiles.

I tend to work in bursts, and try to perform bulk tasks during each burst period. For the current period what I'm doing is dry-brushing a dark gray upon the interior of each dunjon tile.

Here's my todo. It's a lot of tiles. That gray on the right will be what I'm using.

I put the dark gray into a bowl, and I have a paper-towel to help spread the pigment evenly across the brush. I'm using a large brush because I want this to be quick work. The method is to use the flat sides of the brush to paint; any texture in the tiles will pick up the pigment and any nooks or crannies will be left black.

Almost done. 

Done. Let's see what these look like now ...

Here's the top-view of the recently (still wet) tiles with the dark-gray dry-brush. I tried to brush from inside each tile outwards to ensure that I don't get too much gray on the outside of the tiles; I want those black for now. You can see the details in the textures I've created "pop" out.

Here's my Ruga-ruga fighting some Hellhounds. The walls look much better now than before.

Ulp! Ruga-ruga against some sort of hulk-ish demon-thing. And one Hellhound.

What's Next?

I will need to add more texture through color. I'll be dry-brushing my tiles.

Here's what my next step will be; I'll be using a medium-gray and I'll dry-brush it against the bottoms of each wall going upwards about half-way to the top. This will make the walls a bit lighter so that I can add other details to it later.