Friday, September 21, 2018

Preparing for Dunjon of Death III-F :: The Tiles - Done for Now!

VISIT PART III-E

Update

So, this is the final post with the tiles for now because Dunjon of Death needs much more other stuff created and painted.
I printed these out using the Grebb font-face. I'll make the assets available eventually; I just need to confirm that all of the assets work together properly. For example, this sheet has more than is necessary for the tiles since it has tile IDs such as S5 or C5 which I haven't created. And probably won't need to.

Cutting stuff up. There's two sets; one with a red bar for the face of the tiles which I place at the top-left corner. And one matching with a white bar and matching tile ID which I place beneath each removable wall for those tiles with removable walls.

Here's what I mean; top-left red bar. Bottom of removable wall is white bar. BTW, I learned that the glue shown in this picture eats away at styrene ... so it melted my walls where I poured too much glue. Don't be a dummy like me.

These are all of the tiles randomly placed near each other with the tile ID markers always in the top-right.


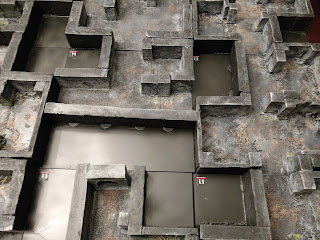
I tried standing on my dining room chair to get an "aerial" picture. First, the 21 tiles flowed over the table and there was no room for the START and END tiles (per Dunjon of Death). Secondly, I think I need to get a selfie stick.

Here's one end of the 21 tiles laid out.

And here's the other end view. That tiny person is my Little One; she helped me paint some of the tiles black early in the project. 


In the Future ...

Here's an example of what can be done with electronic tikki-light torches.

Here's something I'll blog about once I find the ideal solution. Essentially this is a tea-light LED which flickers when given a 3V coin-battery power source. If you look close those wires going beneath the bulb are the leads and they'll cut into the walls. The other side will be the wiring and power source. The square panel could conceivably be switched out for decorations (tapestry cloth, wall column, fountain, etc).

Basically all of the walls with LED torches will be constructed similar to this proof-of-concept wall. At present the 3V coin battery sits atop the wall (5CM) with the wires fed through the center of the polystyrene. The fixture in red is attached magnetically to allow me to remove it and the wires. The yellow strands at the top is actually yellow cellophane from a butterscotch candy treat, and is secured in place with a hot-glue gun.

No comments:

Post a Comment