Sunday, April 28, 2013

Wet Pallet and some WIP shots 4/28/2013

So I finally got around to trying a wet pallet recently and I have to say I really like it.
For anyone not familiar with the concept it is essentially a box with wet tissue paper inside it covered by a single sheet of parchment paper. I really love it and its a great tool.
The moisture keeps your color mixes from drying so it really speed up your paint time.
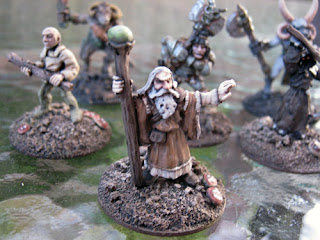
I also thought I would show a few WIP photos I took as the sun was setting here in sunny California.
As you can see there are more old Citadel minis in the works

The pallet


Saturday, April 27, 2013

Sewage Tunnel Entrance Part III

I got more time to work on my sewer tunnel project. Here's what I have got:

This is where I was last time; black primer.
I added a dark coat of brown paint to the base.

I dry-brushed a medium coat of brown paint.
I applied it to the tops of the boulders as well.

I also coated with medium-gray the tunnel itself.

I then added a lighter coat of gray to the tunnel
using the dry-brush technique.

I then took white and lightly dry-brushed the edges
of the tunnel walls and exterior.


Here's some detail of the tunnel before the white.


Here's the tunnel after the white dry-brush of the edges.


I then added two different colors of green into
the tunnel floor.  I chose bright-green for the base.


Here I have flocked the base board of the piece.
You can also see the darker green upon the tunnel.

Another corner shot showing how the flocking
falls upon the base board.  I tried to make it
look organic by letting parts of the board peek through.


I've added some moss to the tops of the
boulders.  It looks like the tunnel has been
through some weathering.

Here's the other side.  The tunnel floor looks a bit bare.

This is the top shot.  The flash on my camera
didn't bleed everything out.  Done!

I think I'm about 99% completed.  I'll check with Damon about how to add a varnish layer to the tunnel floor to make it look wet.  Otherwise this piece is good enough for game-play.  I'll probably spray it down with fixative on the flocking and then spray it again with a matte finish to seal the paint.

Thursday, April 25, 2013

Sewage Tunnel Entrance - Part II

Here's more on the Sewer tunnel; basically I shaved down the MDF base-board and then sprayed it with H20 Black Primer.  Not much else I can do until it dries!

Here's the sander that I used.

One of the shaved-down corners.

Another corner sanded.  This allows minis to be
positioned at the edge of the terrain piece.

My first pass across the tunnel with H20 Black Primer.

Front face.

This is after my last pass.  It's good enough
for actual color paint once everything dries.

Tuesday, April 23, 2013

Sewage Tunnel Entrance - Part I

This is my first project since at least December 2012.  My work has been consuming a lot of time up to even just now.  And at night my youngest daughter though now a year old still requires lots of baby sitting.  Albeit so for both conditions on my available time; I've recommitted to getting some more stuff out!

I put the word out to my co-workers that I'm looking for big pieces of Styrofoam - the white stuff - and I got a huge bag of molded goodness. Of the pieces I received, I saw tremendous potential for new terrain bits.

The big bag of foam.  It's lotsa lotsa stuff!

One of the interesting pieces.  I think these larger ones
take up too much real-estate but if shaped
properly could form the basis for a tunnel
adventure.  That's a lot of work though ... !

That round piece at the left is what I decided
to keep as my first project.
 I'm going to build a sewer tunnel entrance!
 I'll need to make it non-genre specific.

I started breaking off parts of foam to get
some debris for later use.  You can see this
tunnel front; its about 4" [ 10 cm ] in diameter.

The ledge for the entrance.  Needs some shaping.

I used a hot iron.  Be sure to have the fan on
and the windows open; melted foam will damage
your brain and lungs.

Here's the sides of the tunnel exterior melted.

After placing the ledge down.  I used a hot-glue
gun to fix things into place.  Probably tile glue
for flooring is better for this task.

Here are those bits again.

But first, I added some deco to the top of the
tunnel exterior.  This should give the effect
of being large masonry.

The bits are laid out here to form a
foundation for moss and flocking to
add 'character' to the overall display.

Here's the front of the tunnel with more shaping.
The figure is about 33mm tall.  Sort of huge [ 1:48 scale ]


More deco.  I'm laying out the top of the tunnel
with corkboard.  It will look like cement when finished.

Here's what I got so far.  Stay tuned!

Monday, April 22, 2013

Some Finished Old School Citadel Minis

Here's some proof that I am still alive.
Real life stuff has been pretty crazy lately so I haven't been painting much.
I did manage to get a little work done recently and thought I'd post some of the results.
The photos are okay. Some of the subtle color shades aren't too apparent.