Overview
I received a nice gift to myself in the mail today !
My prototype for the MEST Tokens and Markers kit arrived. These kit has two types of components; laser-cut 3mm MDF (thick card-board) for the markers, and acrylic tokens with laser-cut stickers for the tokens.
This actually is the physical set, as I have been using Tabletop Simulator to employ the digital versions for about 6 months now. I will likely need to adjust the proportions of the kinds of markers which I'll need as I can already determine that there's maybe too much of one kind or another. Something like this doesn't come easy to my mind when I'm designing the art, and the reality of it in physical form undeniable. I looked at the spacing of the slugs shown and I think I can have more images per sheet and maybe one or two fewer sheets. I am WIP for adjusting this.
Pictures
I'll just upload the lot of these for thumbing through. There will be small comment blocks for each, but I'll summarize way below in paragraph form.
 |
| Two sets of 3 slugs. |
 |
| Slug 1. An 8-MU ruler, a Scatter Diagram, some Resource markers, and two Transfixed with 5 Acid markers. I think the Scatter Diagram is nice but could benefit from having a 30mm hole at the center within that red ring. I'll have to try it out. |
|
|
| Slug 2. Left-to-right are 5 Burned markers, 4 Poisoned markers, 7 ROF/Suppression markers, 2 Emplaced/Fire-lan markers, 3 Out-of-Ammo/Jammed markers, 6 Hidden markers, 3 Victory Point tokens, 4 Initiative Point tokens. The tokens are kept in hand instead of positioned near a model. |
|
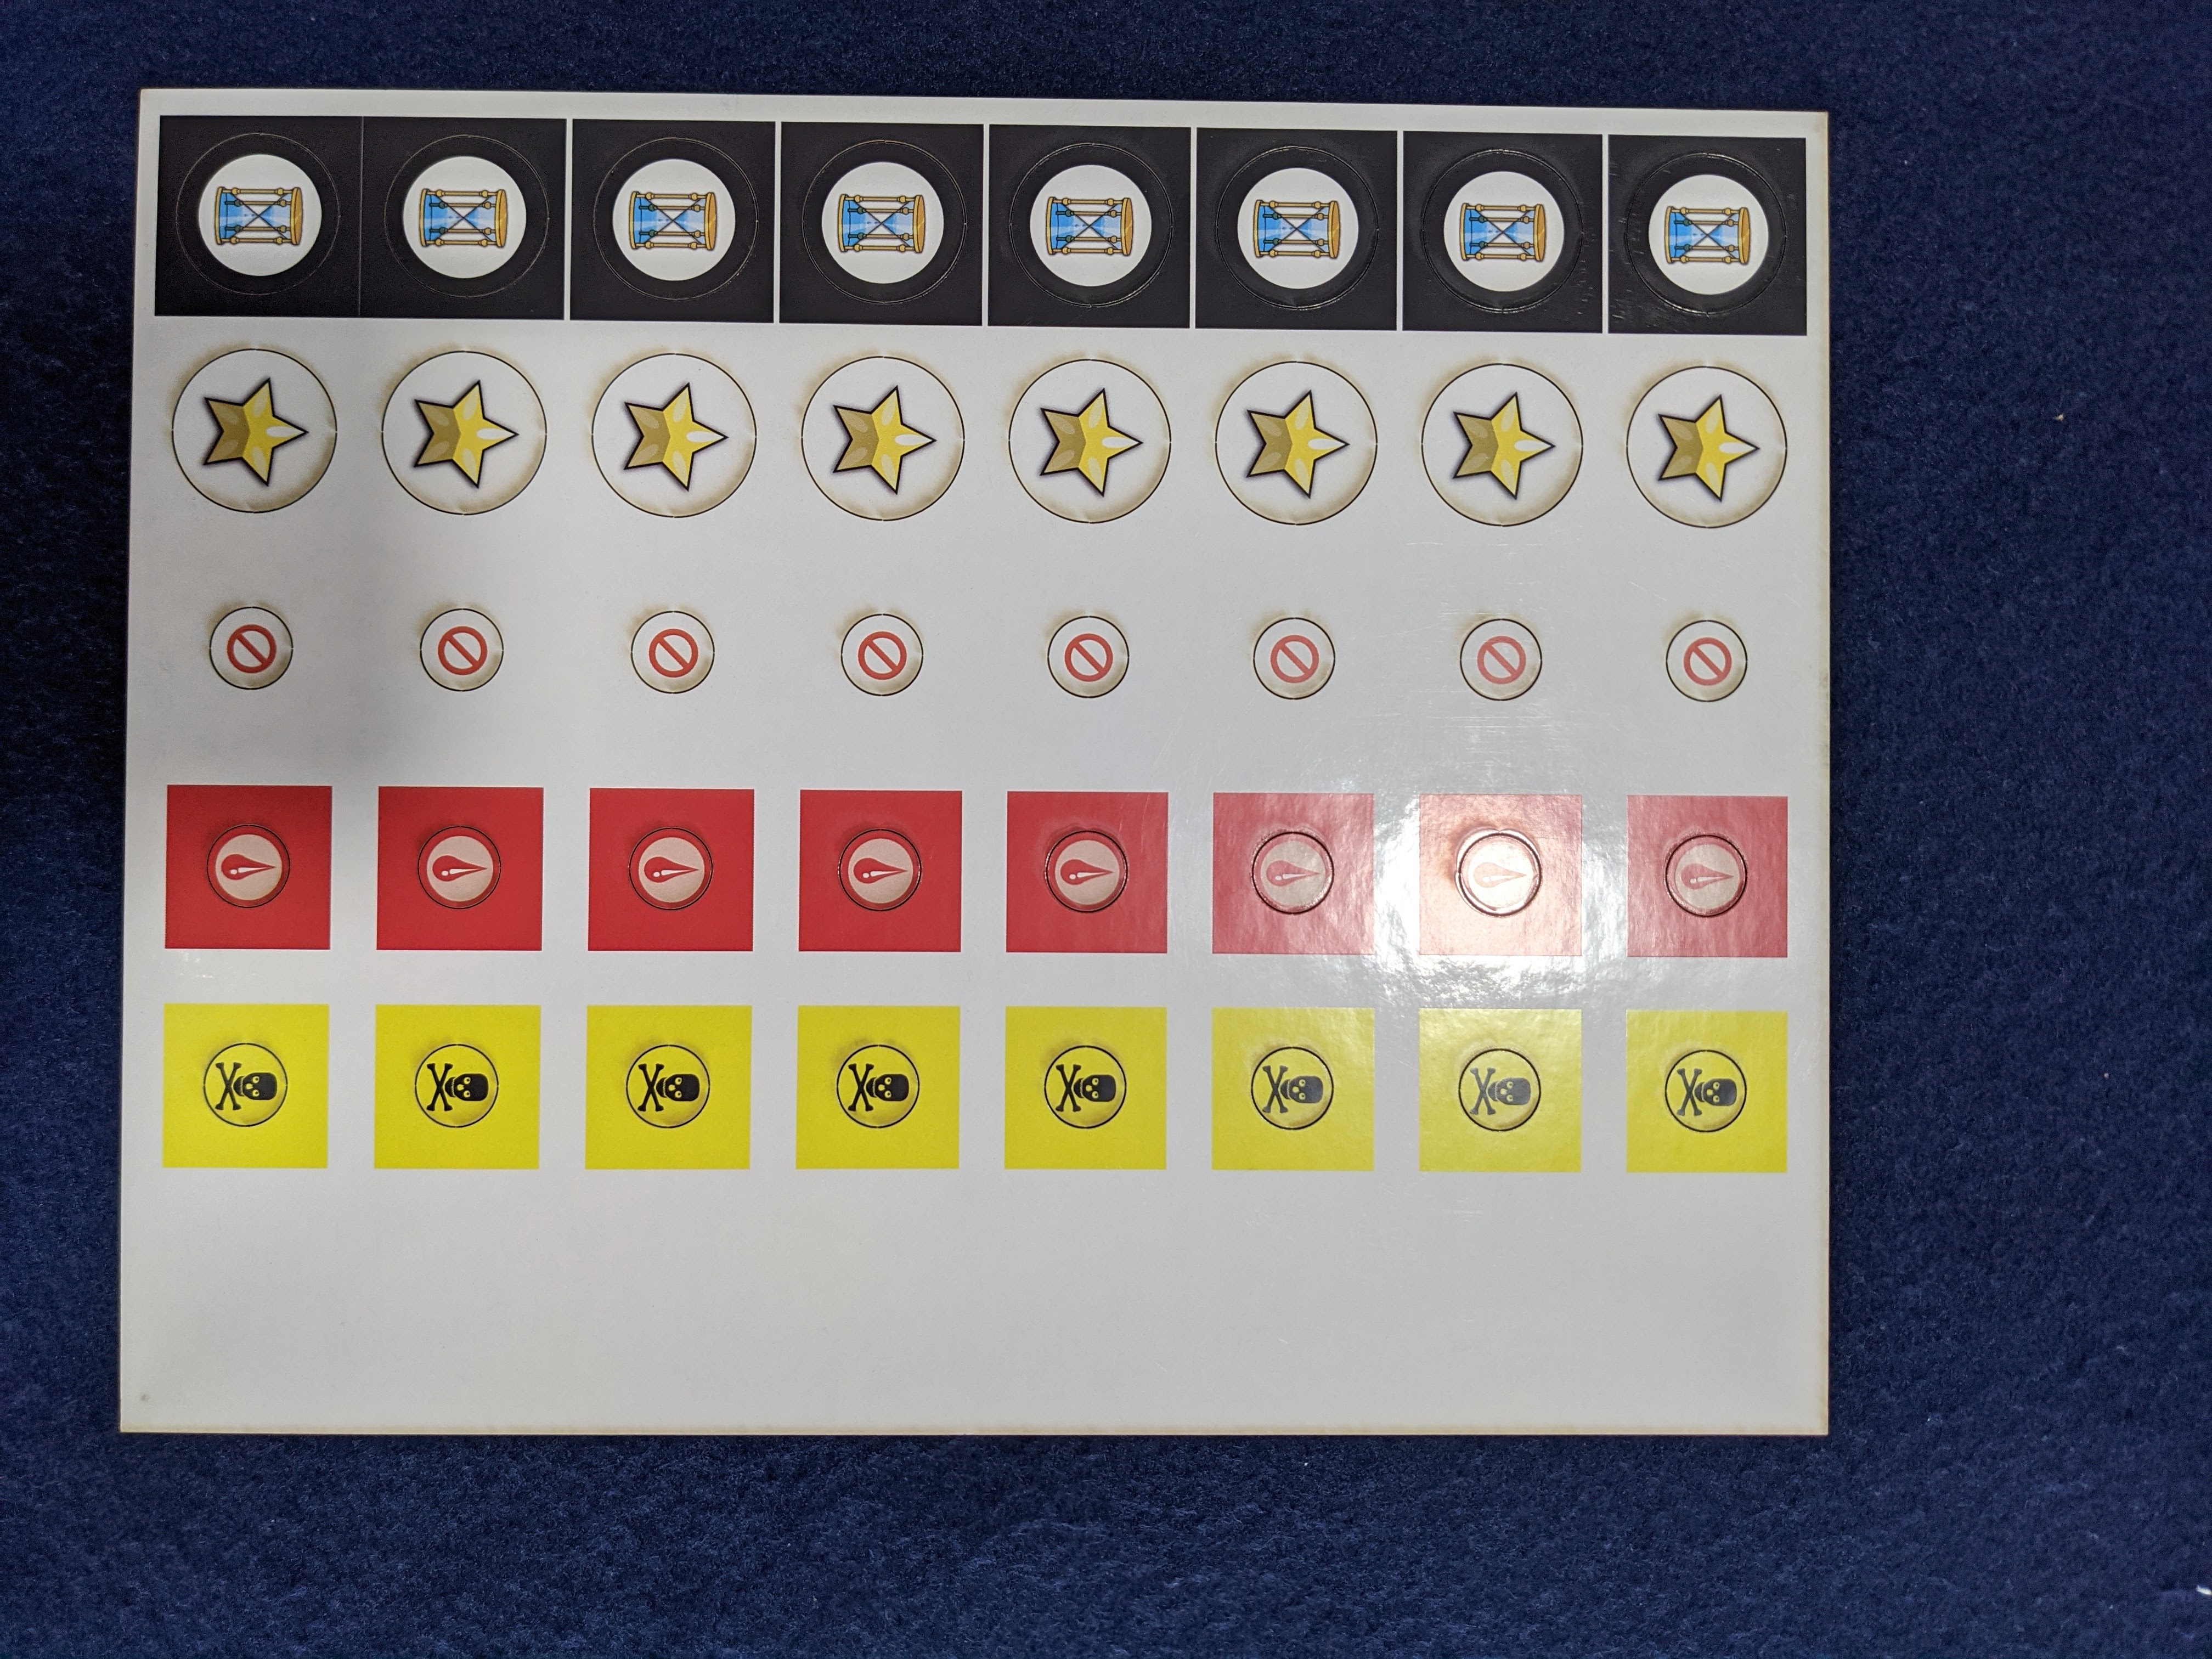
| Slug 3. Top-to-bottom. 9 Go Point tokens, 9 Objective Markers [ Yellow/Red-or-Blue ], 9 Delay markers, 9 Wound markers, 9 Fear markers. |
|
| Top-to-Bottom. 24 Done markers, a slug of stickers, 24 Wait markers. I got an extra Wait (clear) disc with my purchase. |
 |
| A note which came with each slug. I sort of crumpled it, but the message is essentially "this stuff has soot and will smell". The soot is also sort of hard to clean, but I used a wipe and did my best. Be sure to clean your fingers after you finish handling these laser-cut elements as well. |
 |
| The kit's very flat 3mm-thick MEST Ruler at the bottom. A bit flimsy but serviceable. The five green sticks above are hand-made and I like them much better. I think with the final published rules what I will do is have a small section or small booklet on hobby crafts. |
 |
| At the left are my home-made Initiative Point tokens. At the right are the laser-cut ones. The home-made ones are hefty wood. There was close option for that at the Game Crafter made from 3mm plastic but it would have required even more stickers. |
 |
| Left are my Go Point tokens, Right are the laser-cut ones. Again, the home-made ones are hefty because they are stickers on wood. There was no equivalent for the size on the Game Crafter except for some thick laser-cut acrylic at 25mm. But it would have been too fancy in comparison to the more "valuable" IP tokens above. |
 |
| Here's where the laser-cut stuff begins to be more impressive. These are Wound markers and I like the nice size for the ones at the right with the inset artwork. |
 |
| Fear markers. The skull on the yellow laser-cut markers are very nice. |
 |
| Delay markers. Nothing shouts "Distracted" as a nice donut with a line through it. |
 |
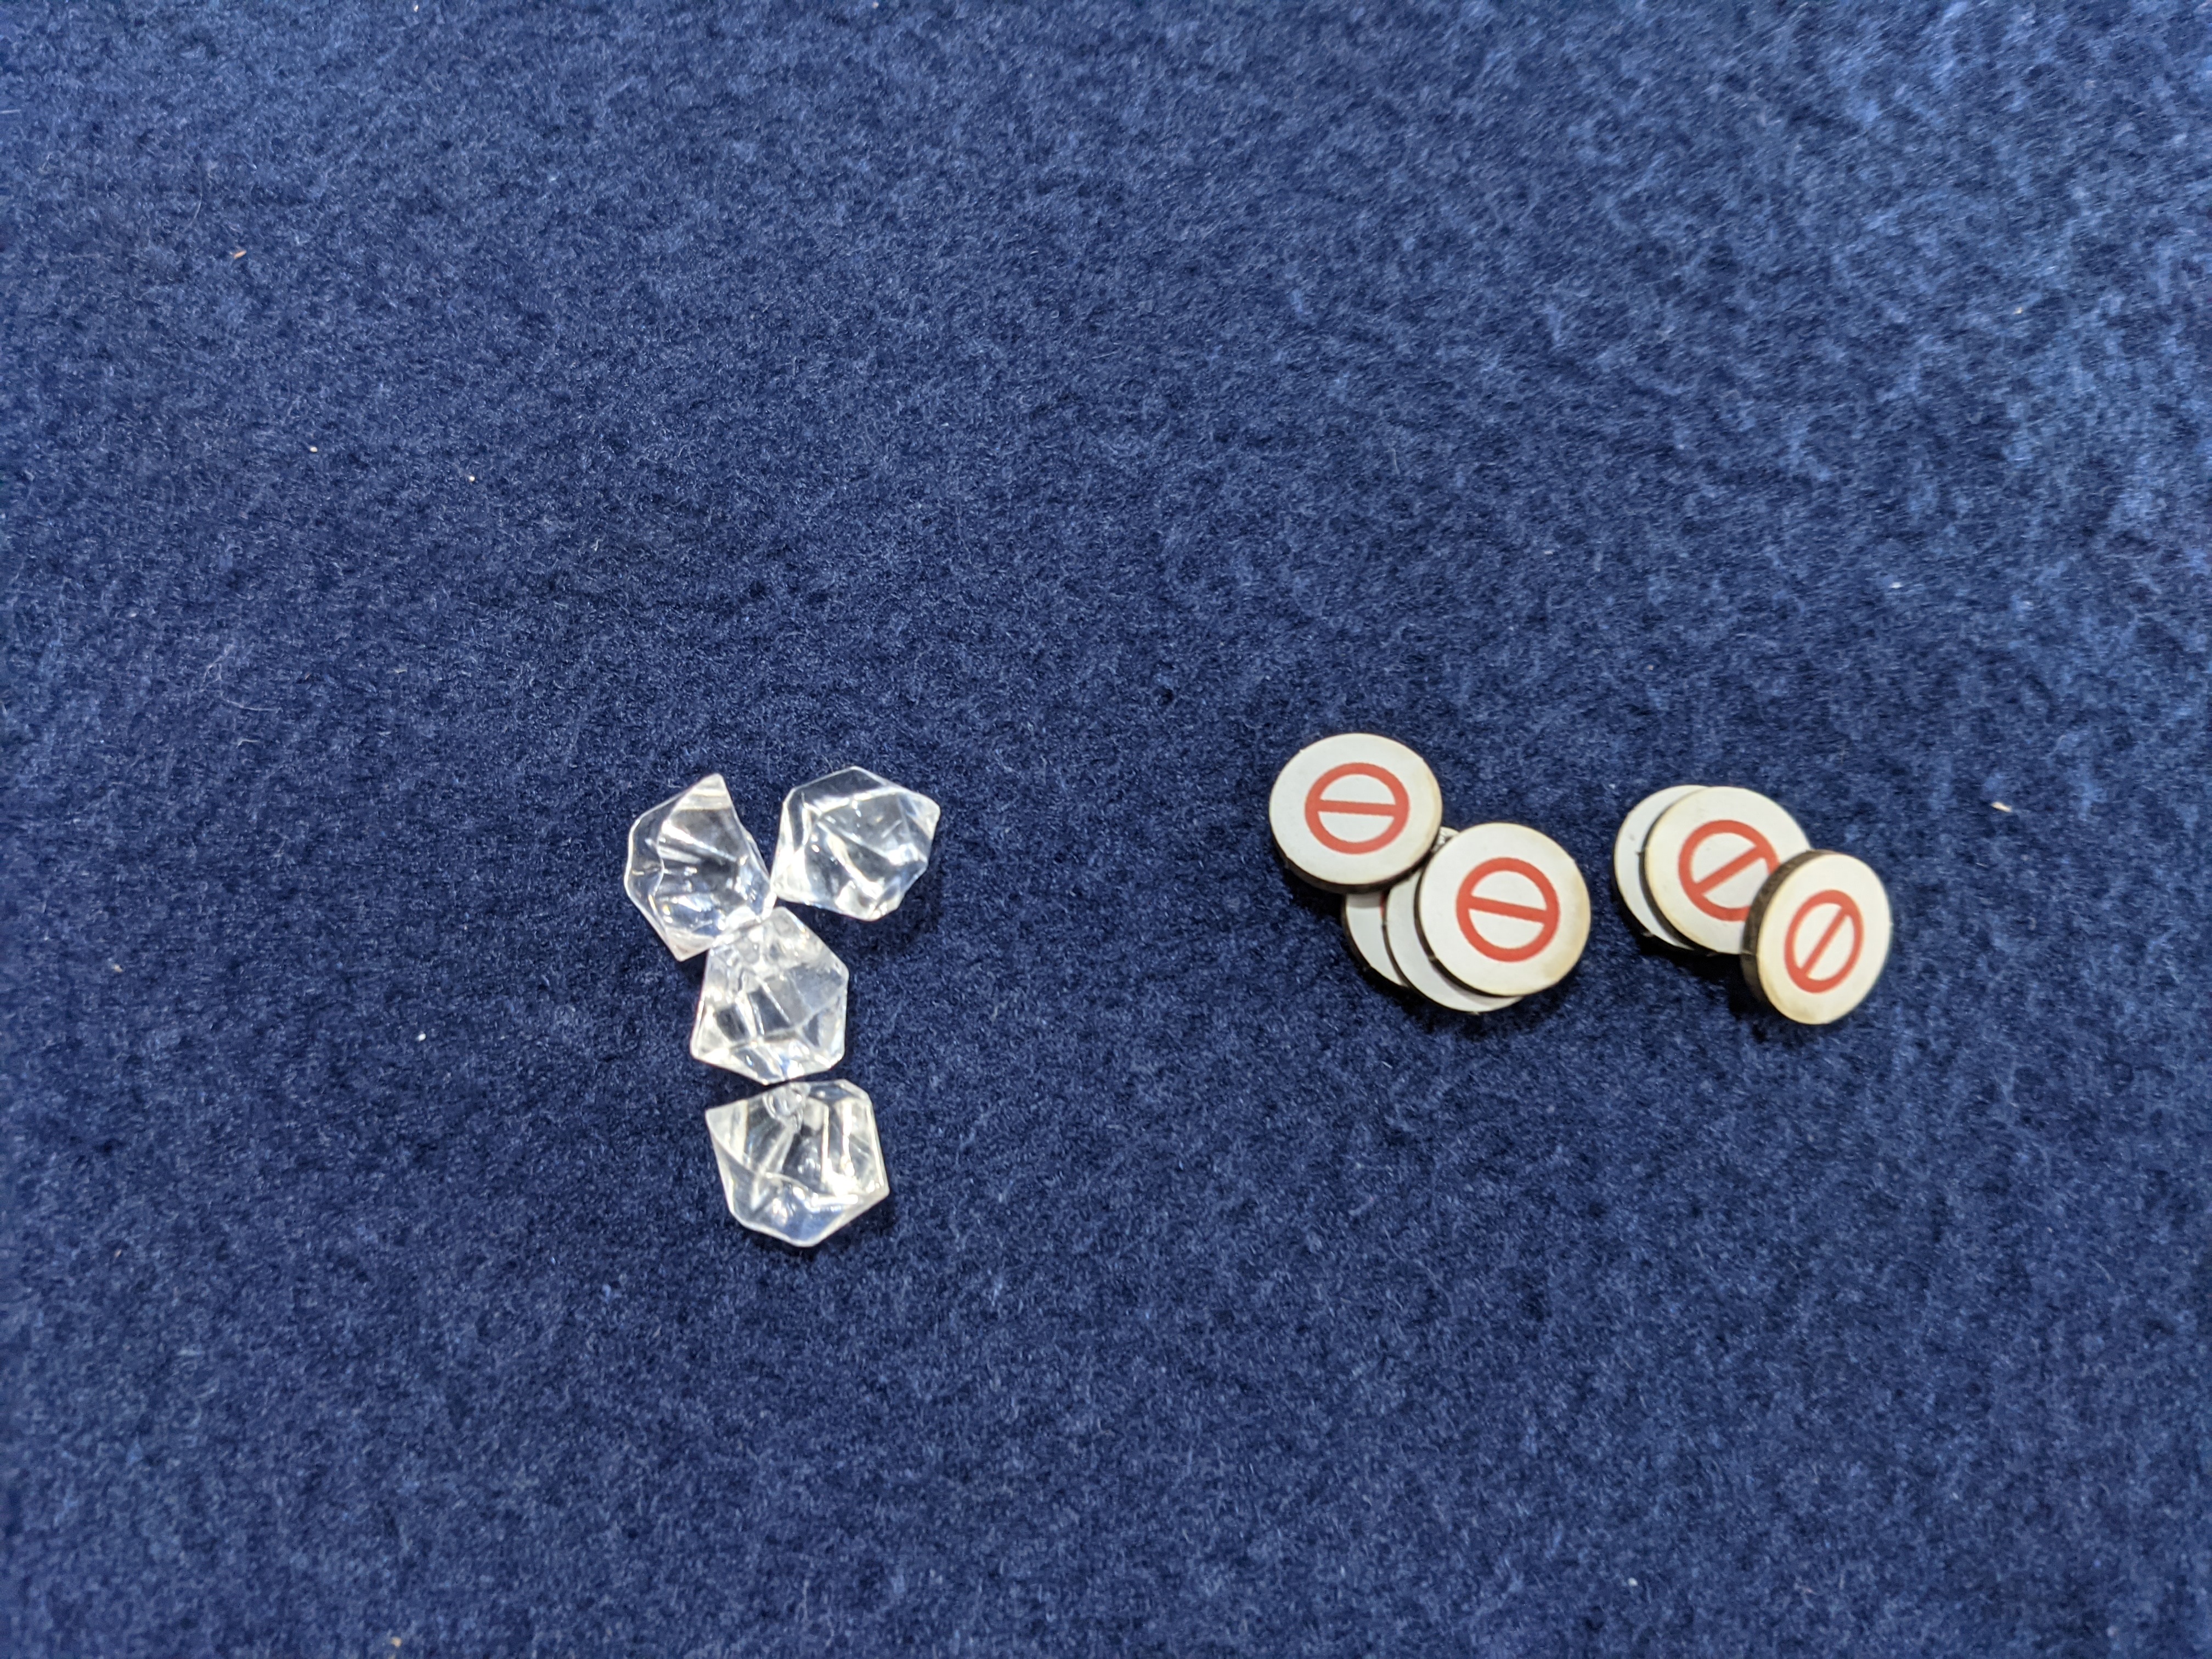
| Hidden markers. The laser-cut markers are nice in comparison to the gemstones on the left. |
 |
| At the left are the Out-of-Ammo! [ top ] and Jammed! [ bottom ] home-made markers which are stickers printed from my color laser-printer affixed to 0.75-inch bingo chips. At the right are the laser-cut ones from the kit which look much better to me. A bit smaller as well. |
 |
| These are the Burned markers. The laser-cut ones are the correct size for a Hindrance identifier. I've been using them in my play-testing and the home-made ones are just too big. |
 |
| These are Poisoned markers. Like Burned, Delayed, Wound, and Fear these are Hindrance identifiers and are all the same small size. At the left is my too-large home-made version. |
 |
| These are the ROF and Suppression markers. At the right these are double-sided with the top ones being ROF. Those are placed and then are flipped to the bottom image to represent Suppression. |
 |
| I am really happy with this one. At the left is my single home-made Confused marker. At the right are the laser-cut versions. The top is a Confused marker, and the bottom is a Transfixed marker. Both are Hindrance identifiers. |
 |
| Out of all of items from the kit, these Done tokens and the Wait tokens below are my favorites! At the left are my home-version as a big blue glass bead. At the right are the acrylic discs with stickers on them. I've been using this version via Tabletop Simulator. |
 |
| The Wait tokens. At the left are my clear glass beads. At the right are the acrylic discs with stickers on them. These discs are the same diameter but thinner than the blue Done tokens and are meant to be stacked together when positioned next to a model. |
Summary
I really like the new laser-cut kit and the acrylic tokens. I think it provides an professional quality to any MEST Tactics enthusiast and I hope to make them available to others soon. Players won't need to purchase these and may always use their own set of home-made markers and tokens just as I have done.
I designed the kit to allow enough markers and tokens for up to 24 models. This number is I think the largest any MEST Tactics game could comfortably manage. It certainly is the limit I've experienced when I've hosted bashes at my work-place and at the gaming conventions.
I looked over my proportions for each of the markers and I think I could make some adjustments on their numbers. I think I provided too many Delay and Fear markers and I could use the excess when I re-jigger the counts to become additional Burned, Poisoned, or Transfixed markers instead.
With the custom cards, the custom dice, and these custom markers, I have nearly everything I need to start focusing on a specific setting. I'll discuss that soon and lay out my next steps.
 |
| How everything looks together. |


No comments:
Post a Comment