Tuesday, December 4, 2012

Scratch-built Board Fences - Part 2

I think I'm done!    See part 1 for how I got this point.

Discoveries

  1. Wet paint loosens glue.  I learned quickly after dropping one of my fences that they are even more fragile after becoming wet with my various paints and washes.  My solution was to add some wood-glue to nearly all of the joins.
  2. Dry brushing can be over-done.  
  3. Black and brown ink washes are very deep and need to be dilute just a wee bit.


An ochre coat  is my first layer of paint after
allowing the black primer coat to dry.  

Here are a normal and gate fence section after
applying a diluted brown ink wash.

This is the result after applying
dry-brushing with brown. 

At this point I decided to re-enforce all
of my parts with some wood-glue because
my washes and paints loosened
the previous glue effort.

I flocked the fence post bases with
fine-grit sand and then painted them
a neutral gray because I wasn't sure
what color I wanted them to be.


Here's the finished product.  Notice that
I added a staple for the gate door handle.
It was painted first with silver and then
it was dabbled with a medium brown.

Saturday, December 1, 2012

Scratch-built Buildings Part 5

Exteriors Completed

I finished obsessing over the exterior frames of my four buildings.  You can see earlier progress with my base-coats here in Part 4.  I wanted to have each building interesting and so I chose a theme for each that I hope to carry through-out the painting process when I begin to decorate the building interiors.  Right now the two large and two small buildings are good enough for general game-play.  The interiors are just in case and also for my OCD.

In these series of photos I try to maintain this sequence for each building; corner view, front door, right side, back door, left side.

Large Building A - The Nice One

A thing of beauty!  Rent or buy now!


All of the door knobs are actually
tiny pronged fasteners.

I don't show it here but all of the chimneys
are painted darker towards the top.

The "Dutch door" at the back is
walnut and chestnut.


Windows that peer into separate
interior partitions. 

Large Building B - The Legacy Fire

Something unfortunate happened here?

The front door and window are
boarded up as a result of an old fire.
The building is in poor shape.

This is the back door.

All of the windows are boarded up.
Back of the building.

Small Building A - Just Old


This design has two different exterior paints.
This building has a porch entrance
and a side entrance.  Once I get the
foundations painted I'll demonstrate
the arrangement better.
I was sort of sloppy with the white paint
but the effect turned out okay;
looks sort of like glass to me.
I'll change it soon enough.

Chimney here shows the darker top near
the soot. I'm debating making all of my
chimneys taller to be more accurate
but risk becoming more fragile for transport.

The effective back of the building.
Bonus view!  I like the emerald tiling
against the yellow and red.


Small Building B - Squatter's House

Front door and a large window.  Old wood?


These windows peer into a single room.
There is no rear entry way.


Ack.  Tsk.  Boarded up window.
We all know what that means; a sure
indicator that this is a hang-out for cultists!

Thursday, November 29, 2012

Scratch-built Buildings Part 4

Update

I've been furiously busy with home + work-life and losing sleep but I got some updates worth showing.  See Part 3 at http://matter-energy-space-time.blogspot.com/2012/11/scratchbuilt-buildings-part-3.html

The status is that I've got four buildings assembled and I need to paint them.  I sprayed them down with Krylon H20 Black Primer because I'm using pink styrene for my chimneys and foundations.  The Krylon latex primer will not melt the styrene.  I still use matte black primer (not H20) for trouble spots because some areas in my constructs don't take well to the latex such as the doors, windows, the ABR plasti-struct spars, and many areas with the glue-gun glue.

Here's the set of pictures thus far; there will be more soon!

All four buildings and roofs primed with Krylon H20 Black  
Experimenting with base colors.  The technique is to
brush downwards from the top of the roof.

The brown roof had a chestnut ink wash stroke
 downwards and then a cream paint dry-brush upwards.

The slate roof had a blue ink wash stroke downwards
followed by a light gray paint dry-brush upwards.


The emerald roof had a base of gray paint
followed by a green ink wash, and then a
dry-brush using cream.

One building has a base-coat of cream.

One building has a base-coat of white.

One building had a base-coat of light-yellow.
I intentionally left more of the primer appearing
above the boarded-up windows to plan for
the aftermath of a legacy smoke + fire.

The last building I painted with two different colors.
As an added bonus, my daughter's house has
deep purple and orange (not visible) exterior
paints.  I'm teaching her the craft.

That's her voodoo monkey.


Wednesday, November 28, 2012

circa 1920 floor plans

The Sears Catalog

I suppose that in a 1920's type genre like HPL Mythos the buildings should be perhaps 1880's Victorian or 1900's Edwardian designs but those floor-plans are hard to find and harder to craft from the designs I've seen.  Maybe when I get better at this hobby but for now I've decided to focus mostly on boxy pieces which I think are much simpler to construct.

Here's some reference materials for use when constructing your 1910 to 20's era suburban buildings.  These would be the sorts of buildings in new neighborhoods at the time.  Nearly all of these designs come from the Sears and Roebuck catalog.  My favorite starter is the 'Natoma' which formed the basis for my smaller buildings.

A 24" x 24" battlefield layout could support about four of these smaller homes which are about 1000 sq. ft. in size.  Those homes translate to about 4" x 6" on average or something like 24 ft. x 36 ft.  Many of the room partitions are really too small to be translated for use in a 28 MM game, but it would be nice to have some divided interior space to make battles within a building interesting.

I've selected a few of the designs that I think are simple enough to recreate; they are boxier than the others and represent what I think are more of the "New England" style representative of northeast USA. 


The Natoma; simple design.  Only $191.00 US !
An interesting 2-story small house.

Candidate for a larger building; just remove the smaller
partitions inside such as bathrooms and closets.

 
A typical four-square design.

I think this is the ideal 2-story small house.

I need one of these!


Monday, November 26, 2012

Brickworks Tutorial

Styrene Is Your Friend

If it wasn't for styrene - the pink sort - being available at my neighborhood 'do-it-yourself' home supplies store, I'd be out-of-luck.  I prefer the denser white styro-foam because it is easier to create shapes but two things are against my choice of it.  # 1) The really good stuff costs lots of money, and #2) The cheaper stuff is irritating to carve because it squeaks when I put a knife to it.

As a result, I went to my Home Depot (or Menard's, or Lowe's, or Orchard Supply Hardware) store and picked up a large sheet about 0.50" thick.  These housing insulation foam sheets are sold in 48" x 96" and so I have more than enough ... for now.

Brick Stamp

You'll want to create a brick stamp using the eraser end of a standard #2 pencil.  Just remove the eraser nub and reshape the eraser nub container into a rough rectangular shape.  It doesn't have to be precise. 

Brick Walls

I create my brick walls by cutting out styrene into sections that are 35 MM, 50 MM, or 65 MM tall and into 6-inch and 8-inch sections.  Anything larger than that is not useful for free-standing walls because they'll force too many gauntlet situations during game-play.  Shorter sections are useful if joined into L-shaped corners.

Use the brick stamp to apply pressure against the styrene to form offset rows ('brick pattern').  Try to keep the rows flush with the edges of the walls.  This effort will be tiring to your fingers but after many sessions it will become easier to do.

Finesse

I often draw fragmentary outlines on the walls where I DO NOT stamp bricks.  These I use as guide-lines for when I paint later.  The areas within the outlines I paint a lighter flat color to simulate old mortar facades.  I also cut out long strips of cardstock or plasticard just a bit bigger than the footprint of each wall and affix them at the base in order to improve stability.

Painting

I'm informed by Aggro84 that the best way to paint styrene is to use a black primer coat which can be had using Krylon H20 spray paint.   You may want to purchase a lot of this.  For now, what I been doing is applying the primer coat manually using black or white acrylic paint.   Many of my walls are red-brick and so the pink styrene often won't need to be primed too much or at all.

Paint a base color upon the black such as a medium red.  Then, visit every brick with a different color from a fixed palette such as pink, light-red, and white.  It is quicker to take one color and dabble every third or fourth brick.  Try to avoid clusters of bricks with the same color.

Afterwards, add a thick black wash which will add strong contrast when the wall is finished.  When that drys, use the dry-brush technique on all bricks.  This gives a dusty look to the wall for the final effect.

My brick stamp is made from the end of a #2 pencil.

By creating offset rows with the brick stamp I can
generate a convincing wall out of styrene.

The bottom of this wall has an outline below which
I do not stamp. I reserve that to paint in white.


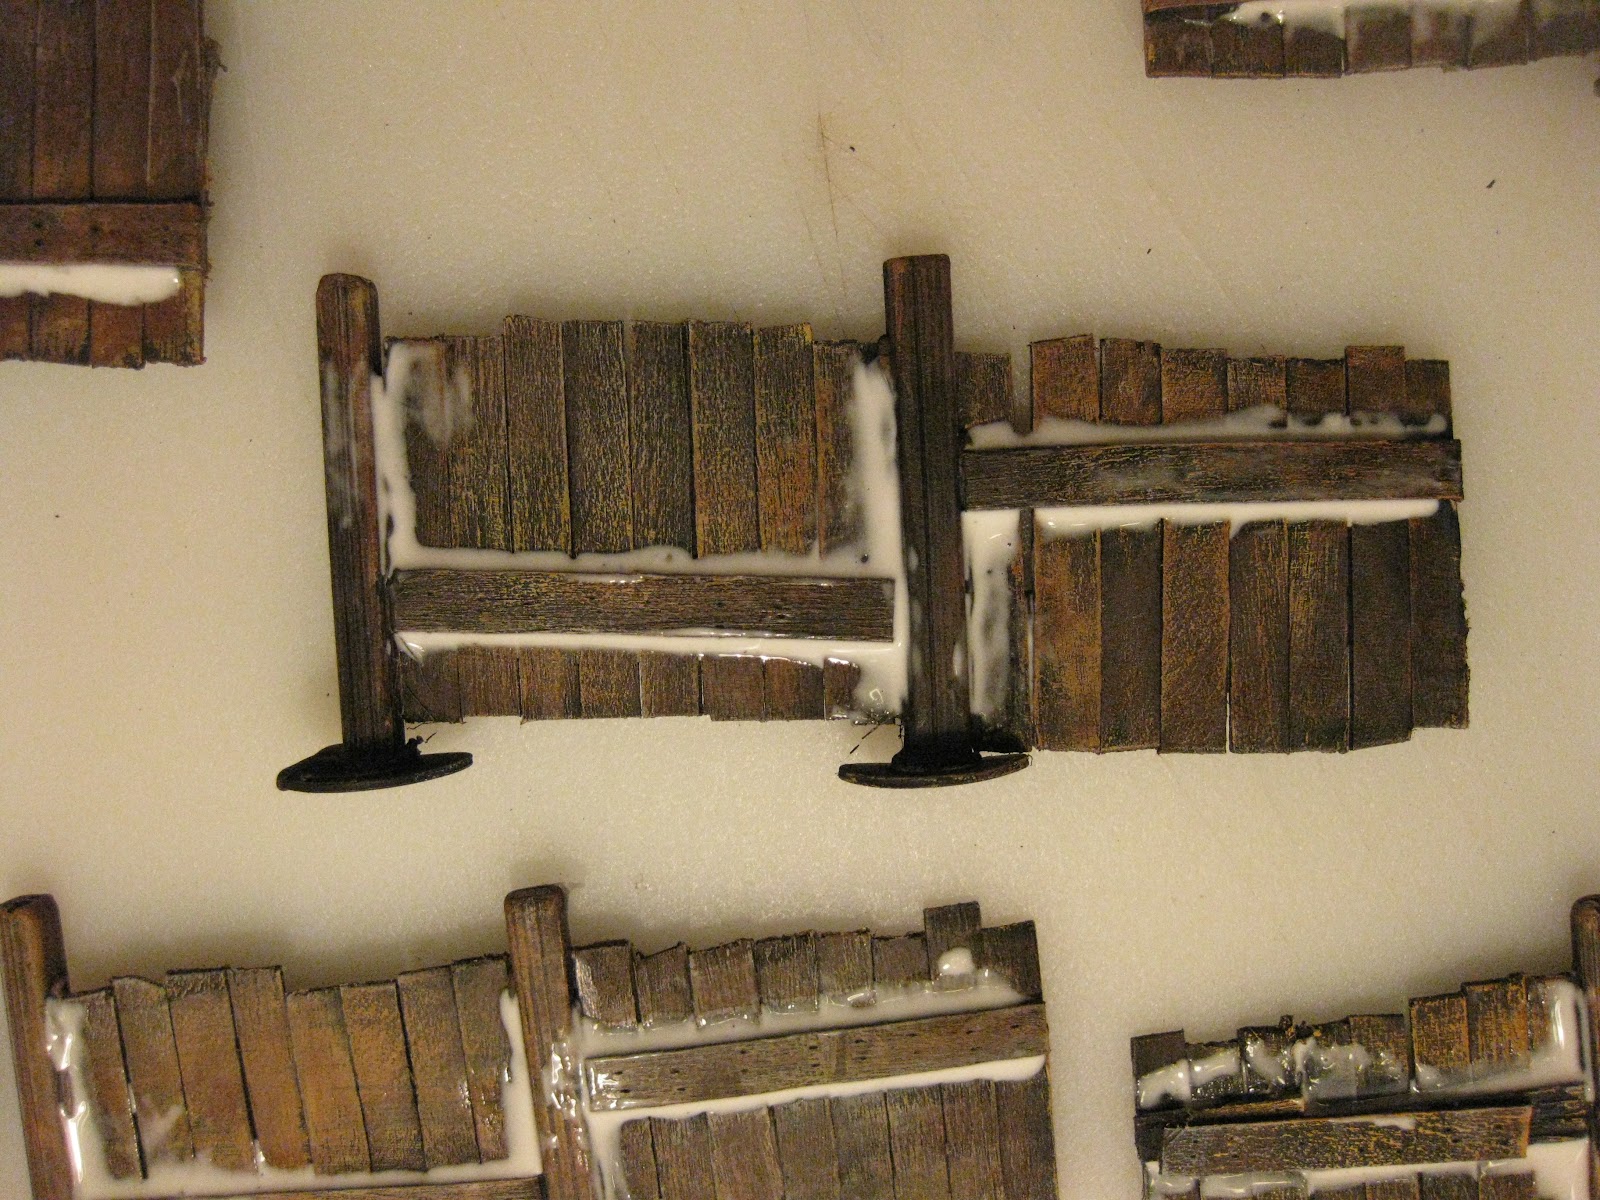
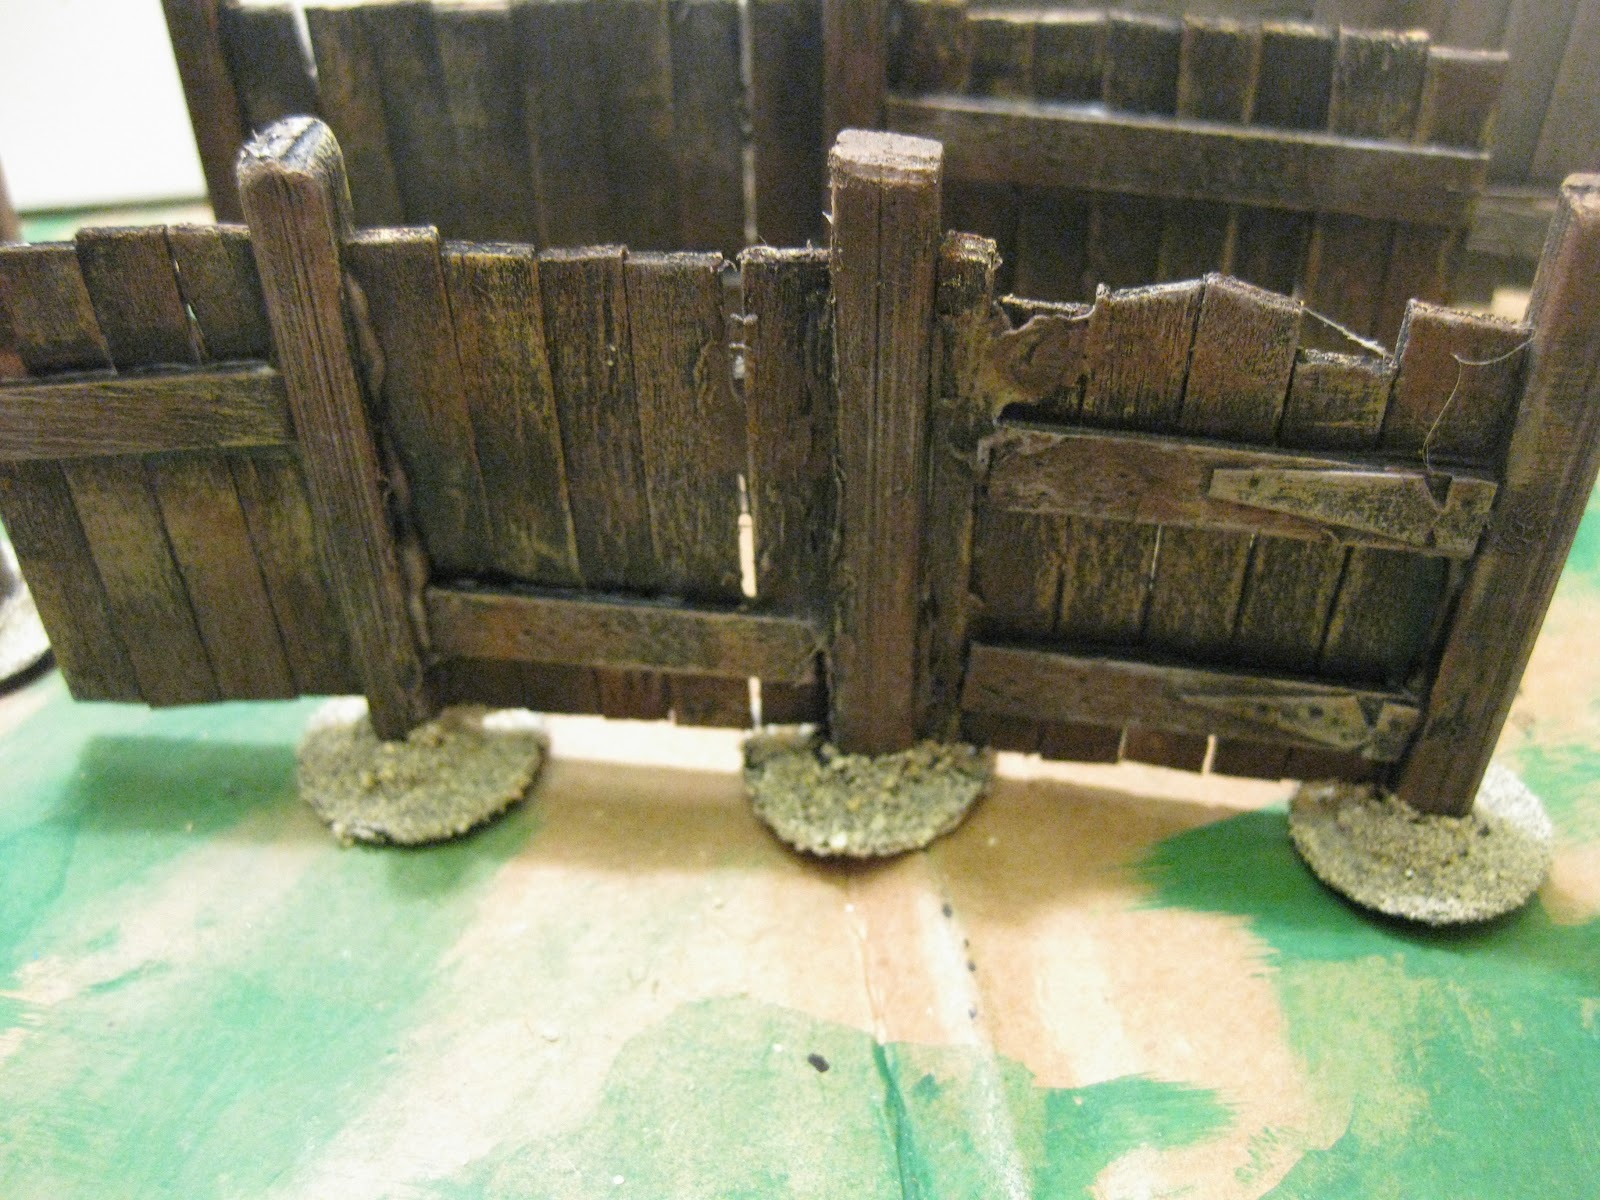
These free-standing walls are work-in-progress
and are about 50 MM tall.  They are mounted
upon plasticard to improve stability.

When painting the walls, vary the color of each
brick from a palette of pink + light-red + white.
This wall section is about 25 MM tall.

Sunday, November 25, 2012

Kung Fu Vs. Zombie - The Bat Rep that Wasn't

I set up a board hoping to get in a game with Wee Aggro; however, things didn't go as planned and we didn't get a chance to play. Still, I did manage to take a few pictures before breaking down the board.

In most kung fu movies (as opposed to Western Pulp Adventures) Westerners are generally portrayed as the baddies more often than not. I thought it would be fun to have a group of locals from a martial arts school / secret society put the hurt on a renegade colonial scientist and his zombie horde!

These were scattered about the board to serve as
zombie spawn points. Gunfire would
generate more spawns.

The renegade scientist and his hired toughs.


Our valiant heroes.

The scientist's zombie horde.

The scientist's compound
peeking outside.


Work to do.

Surrounded

Defending the compound

Closing in.
This was not part of the planned scenario,
I just realized I had never shared it before.